Very brief introduction. Ride With GPS (rwgps) is a bicycle route mapping product and web site that our bike club is using to generate maps and cue sheets for routes. These need to be accurate and reliable. This article is written for ride leaders who are developing routes on rwgps and already have some familiarity with the product. The rwgps web site has plenty of introductory material, including videos, on developing and modifying routes. Here we are focusing on a common problem: getting routes to start and end in parking lots accurately.
Here's the deal. RWPGS uses software by Google, OpenStreetMaps and others. This software primarily focuses on ROADS! A parking lot is not a road. Neither is a bike path or rail trail or the woods. To make a route use a parking lot or rail trail, you need to use the draw lines tool and know how to integrate that tool with the follow roads tool as well as strategic placement of control points and manual entry of cue sheet entries. It gets a bit difficult at times, especially if you are fixing up a route that was not done perfectly in the first place.
One of the big difficulties is that the software I referred to draw lines on the map to indicate the route to follow. In many cases our bike routes are "out and back" ... which to say that they use the same road coming back to the parking lot as they did leaving ... just going in the opposite direction. Seems obvious ... but the 9 mile point can be at the same point as the 1 mile point. Actually a rider at 9 miles would be on the opposite side of the road from the one at the 1 mile point, but the resolution of the map is not enough to show that (normally) so it appears the lines overlap. And this little "deficiency" can drive you buggers when you try to modify a route. end of introduction
Rather than be theoretical, let's look at a sample with a map before and after the adjustment of start and end points. This is a route that uses our new local rail trail and starts and finishes at a parking lot near downtown Albany. It goes straight out the rail trail then comes back past the start, does a loop around downtown and comes back to the starting point over the same roads it used to start the loop.
Here is the original start

Notice the little green icon in the trees? That's the where the start was originally entered. On the left side, I noted that the cue entry has the start .2 miles into the route. Also notice that the finish cuts across Pearl Street and over a grass area to a little brown icon that's not quite in the Parking Lot.
And here is the modified start
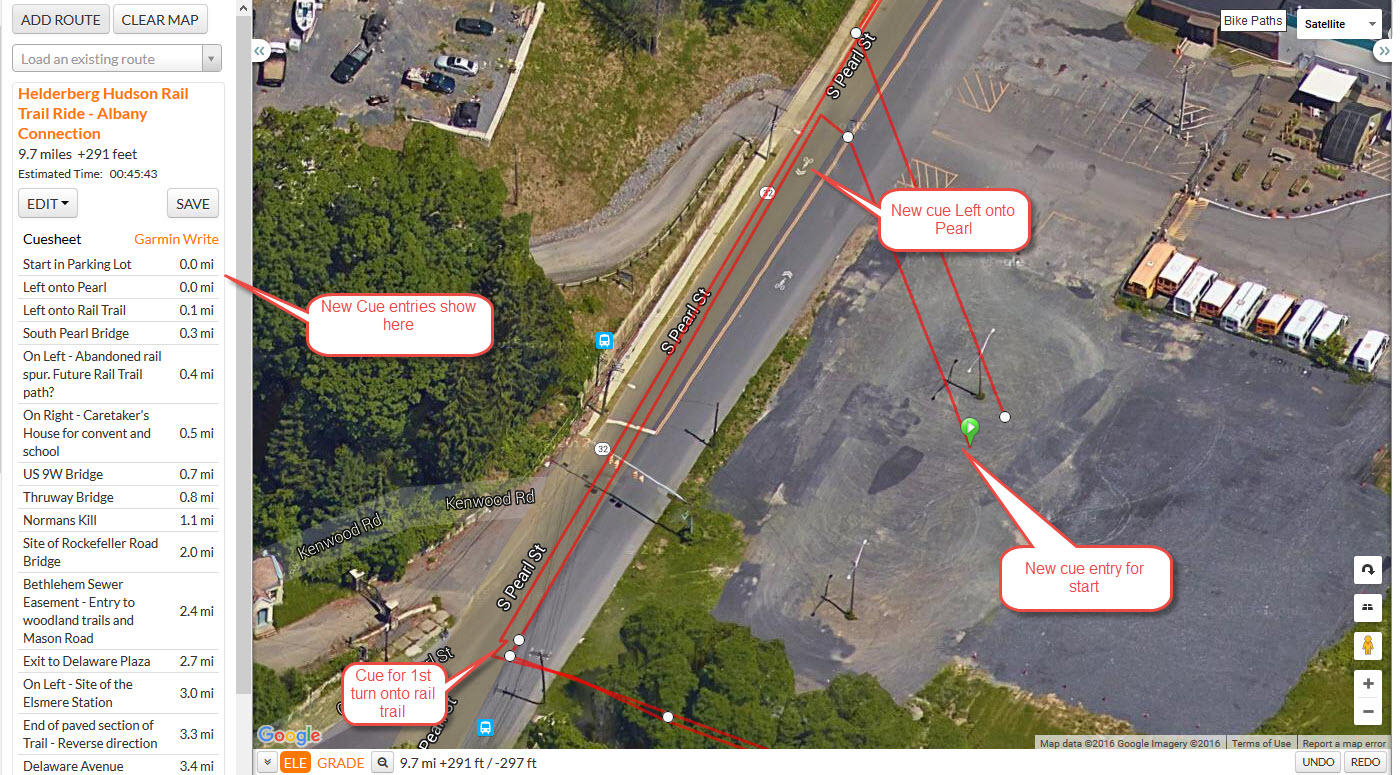
Modifying such a route to make it correct takes a bit of work because of anomalies (especially overlapping out and back lines) that I've mentioned earlier. That's why it is always best to get it right at the outset, checking each cue entry (left side of screen) as you enter them and using undo (bottom of screen) as soon as needed. To make the modifications above, I had to add control points around the original start icon (using the distance scale on the altitude area at the bottom of the screen) to make sure I was adding them at .0 miles rather then at 6.2 miles where the route circled back through the "same points". Using the new control points around the start as "anchors" I was able to drag the start icon up Pearl Street near where I wanted to have the route exit the parking lot. Then I added another control point on Pearl street right where I wanted to turn out of the lot. It's critical to make sure the distance on this is at zero miles. Now, using this control point as an anchor, and going into draw lines mode (right side of screen) drag the start icon into the lot. Next, using the add to cue sheet entry, add one cue right by the start icon and another, left on Pearl. Finally one cue entry indicating the turn onto the rail trail at .1 mile.
And here is the original end
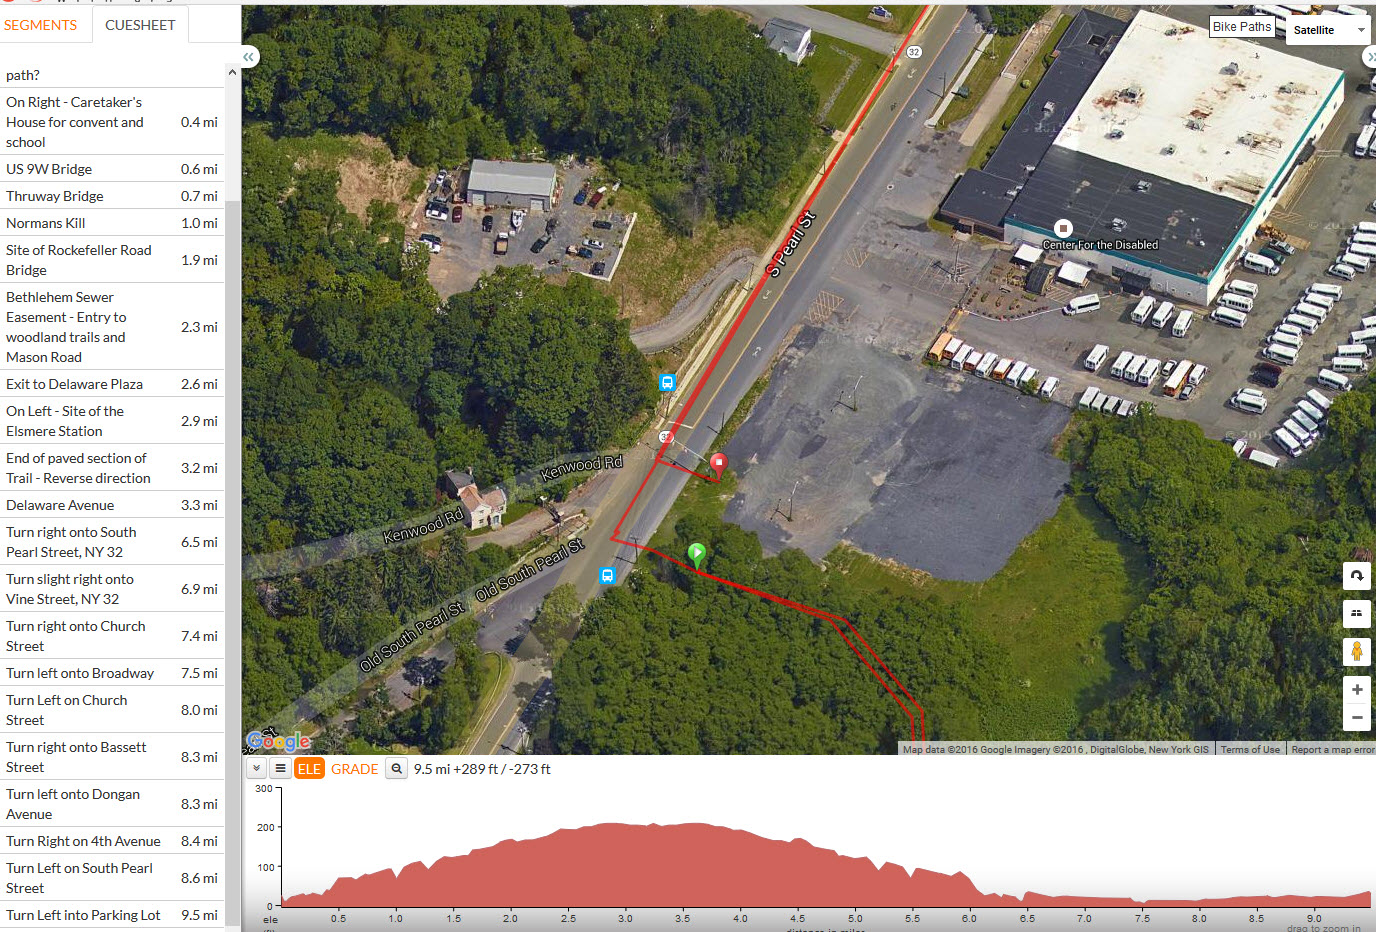
Note that the end icon (brown) shows the route cutting across some grass and not quite making it into the parking lot. Correcting this can take some doing because of the out and back nature of the route. Basically I had to go out to the turn on South Pearl at 8.6 miles and add some control points coming back along the route line to the finish taking care that I was adding them from 8.6 miles up. Once I had a control point at 9.5 miles, where I wanted to make the last turn into the lot, I was able to drag the end icon over to it. Then use draw lines mode to drag the end icon into the lot. Then add another control point (anchor) right before the end icon and add cue entries to indicate the turn (Left into Parking Lot) as well as one inside the parking lot.
And voila here is the modified end

Summary of key points:
1. Know how and why to use control points as anchors.
2. Know how to use altitude line and mileage markers at the bottom of the editing screen to position your control points. Practice positioning control points at the mile marker you need.
3. Know how to go back and forth between satellite view and map view. Know when to do so.
4. Know the difference between follow roads mode and draw lines and when to use each. If you are in the wrong mode at the wrong time you will get the wrong results.
5. Know how and when to use "add to cuesheet". Usually, in follow roads mode, rwgps will do this for you but sometimes you have to add them manually.