To start a route, hit PLAN from the main menu, then type an approximate location into the "Jump To A Location" drop down box (right of screen). This will get you to the general area of your route ... then scroll the map to the exact location ... in this case the Bethlehem Park and Ride.
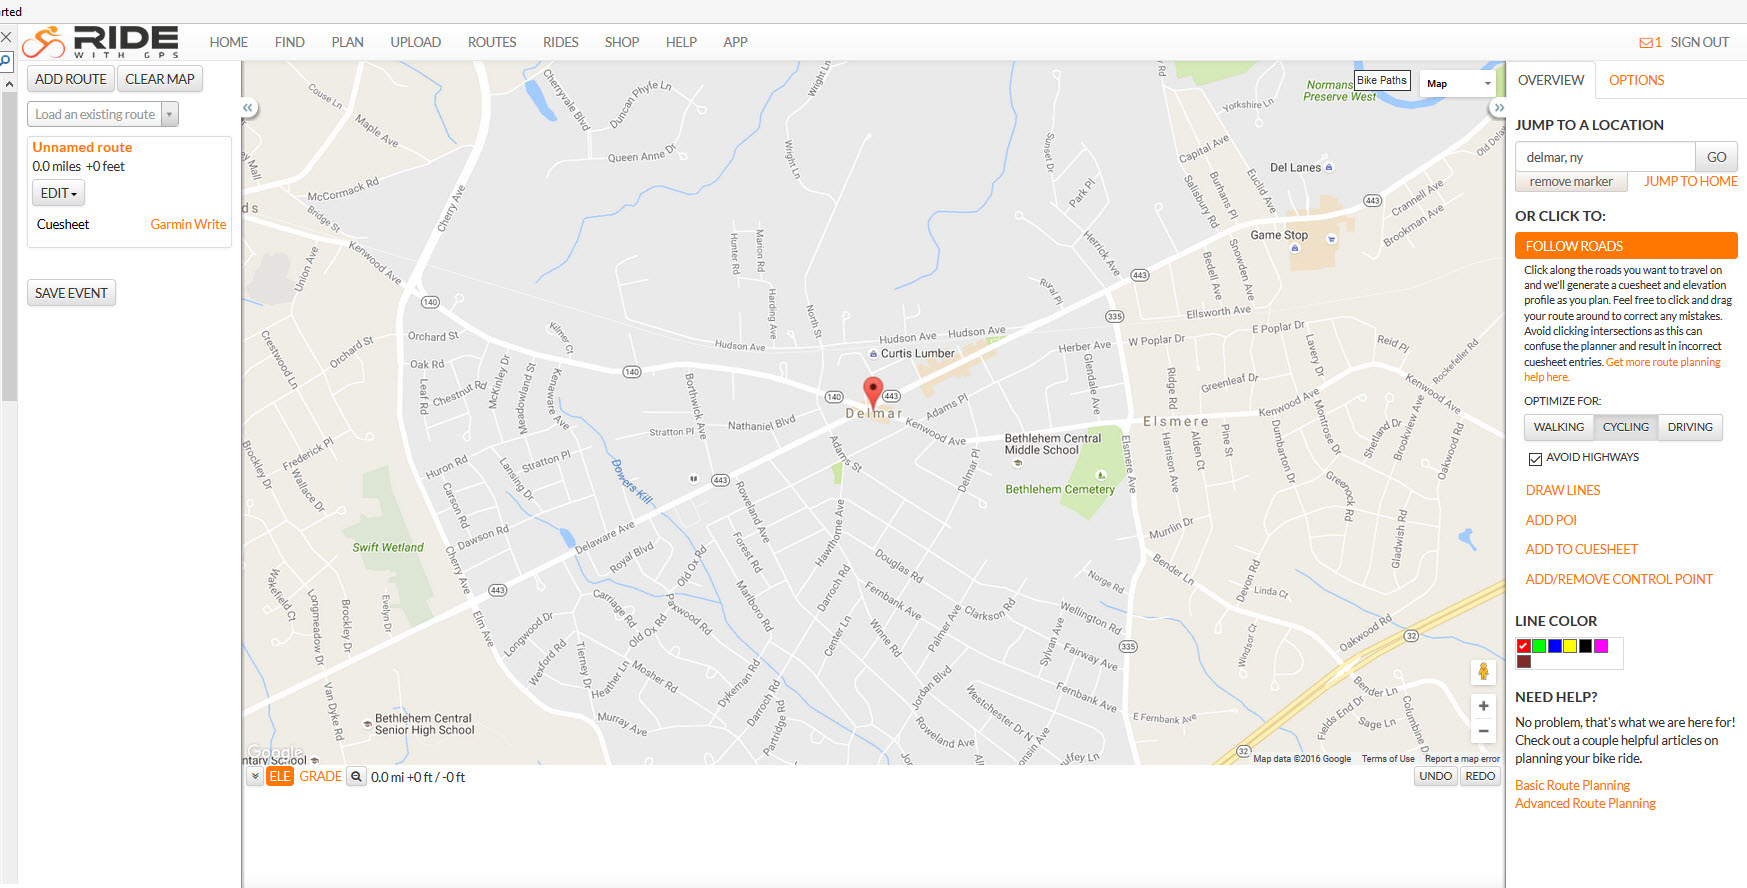
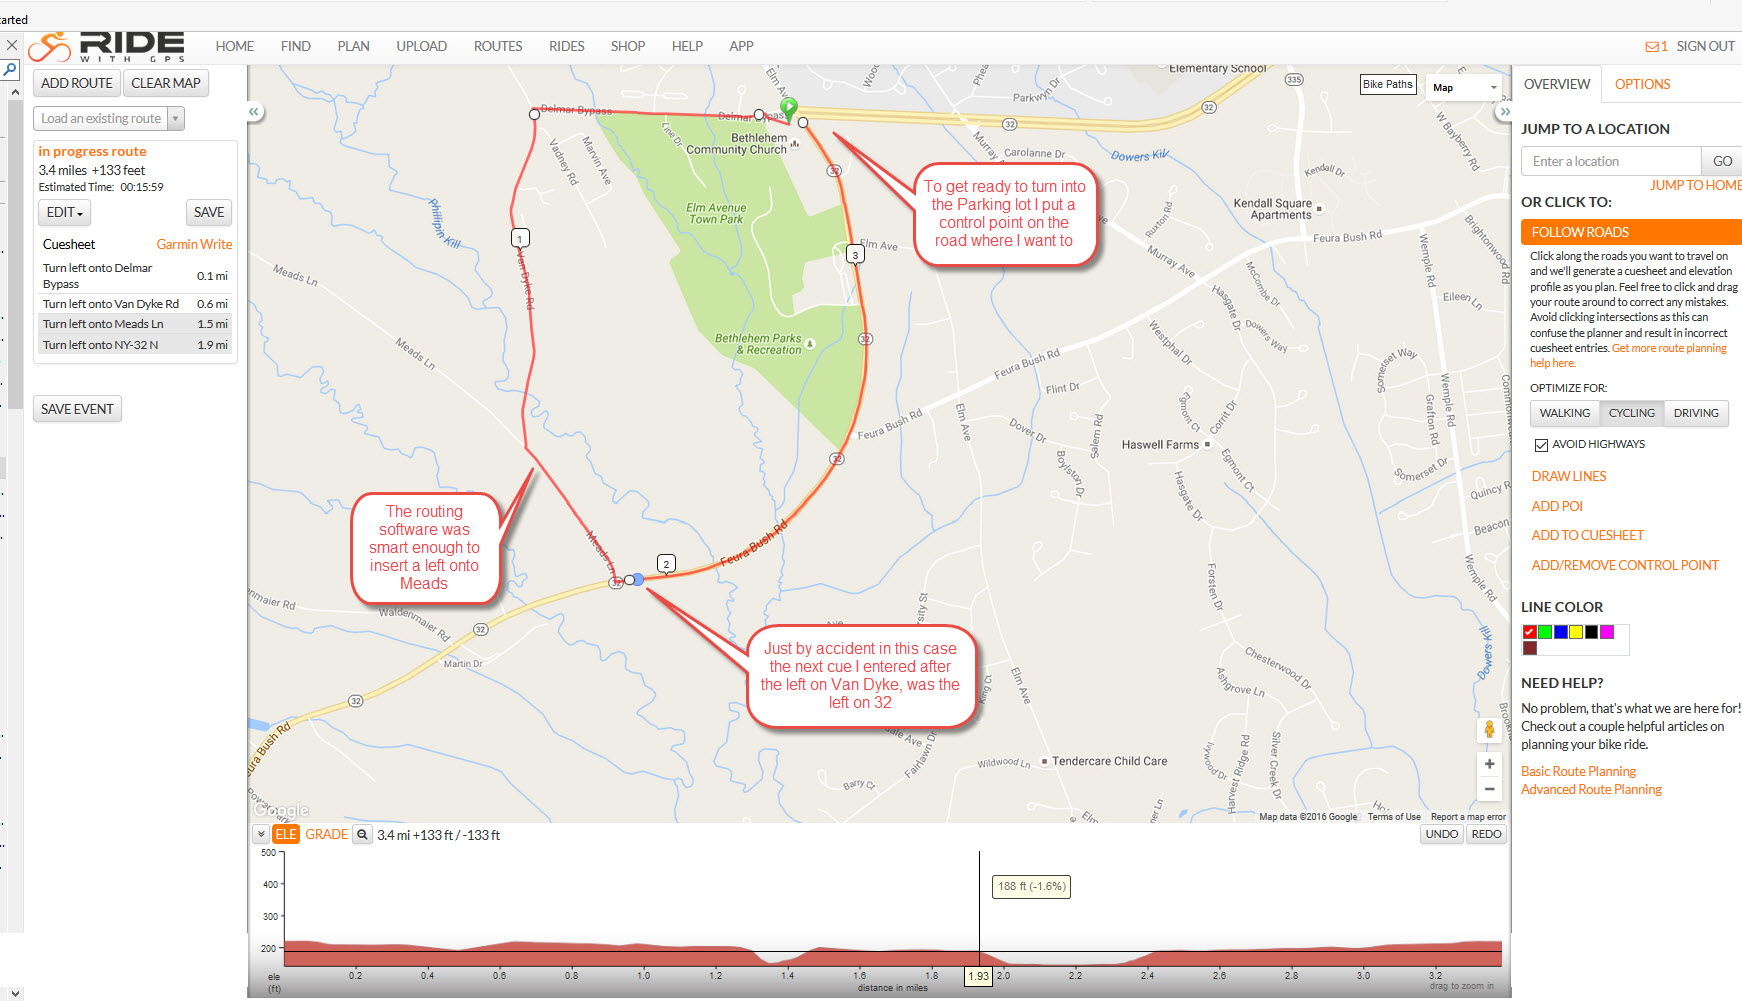
Once you find the starting location, click on Satellite for the map style (upper right) and zoom in a couple of levels so you can see the parking lot clearly. The + zoom button is lower right. The screen below is annotated to show different features that will be discussed.
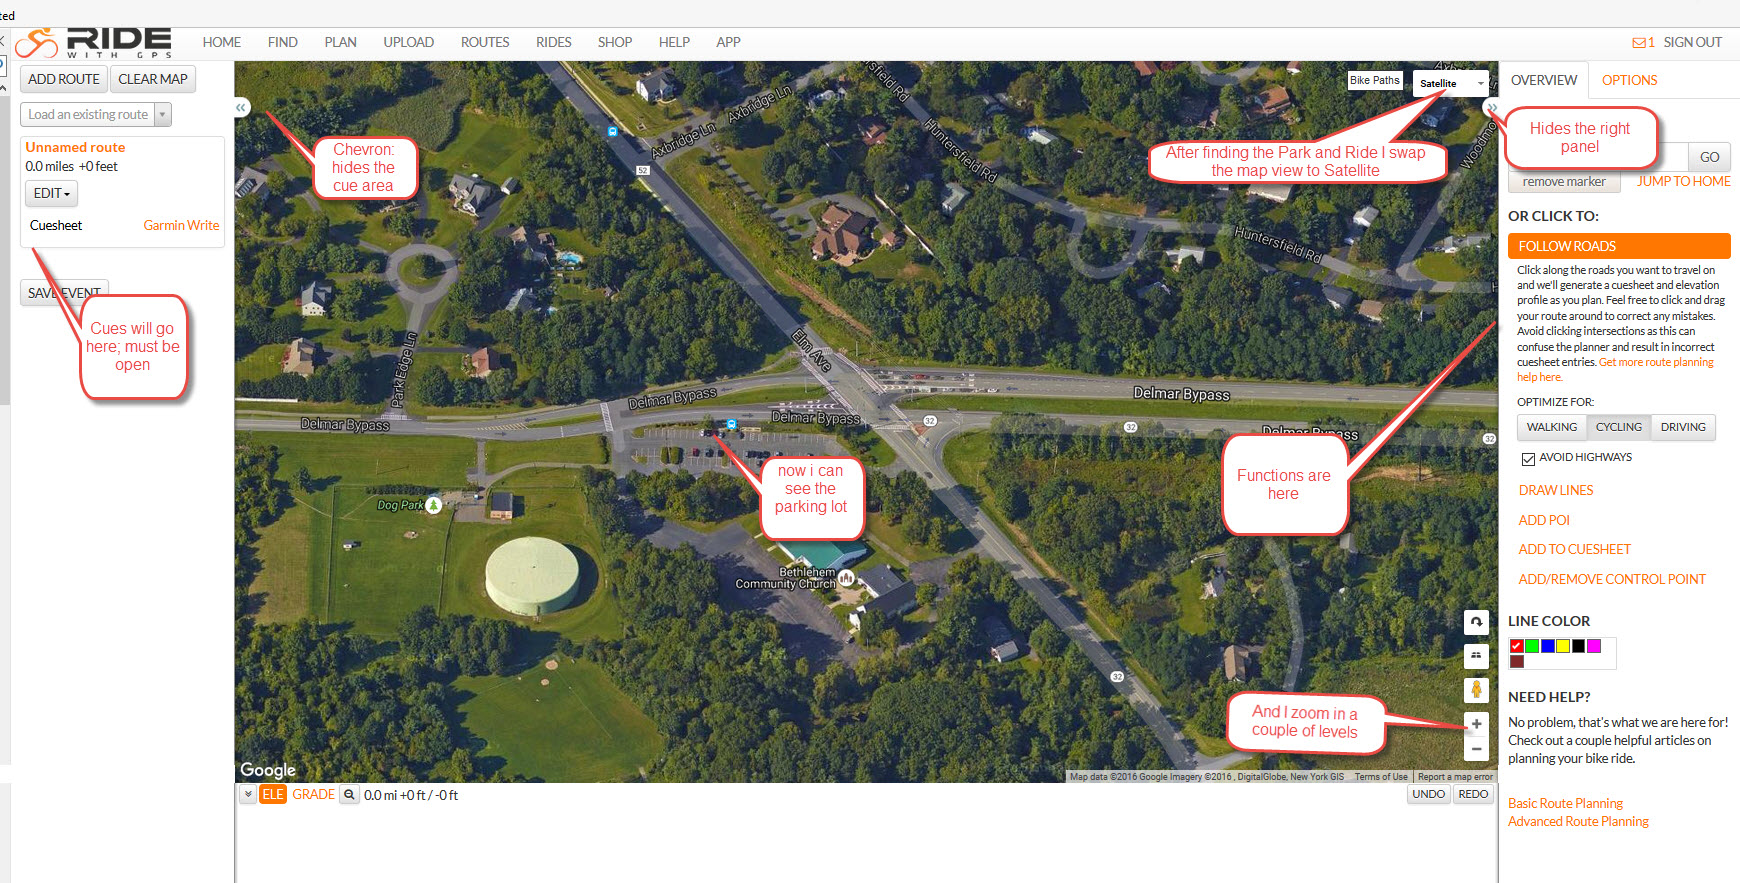
Annotations: the chevron in upper left shows or hides the cue sheet area, the left panel. For route creation you need to have this displayed. I had one ride leader who complained that he couldn't see the cue entries. The chevron must have been clicked to hide them and its function was not obvious. The cues themselves will be displayed in the left panel as they are created. We will see more later.
In the center, by zooming in I can see where I want to start the ride in the Parking Lot. The major mapping functions are in a list in the right hand panel and include follow road, draw lines, add POI, Add to Cuesheet and Add/Remove control point. We will be dealing with each.
At this point you have your starting point centered in the map and visible. Let's go to work.
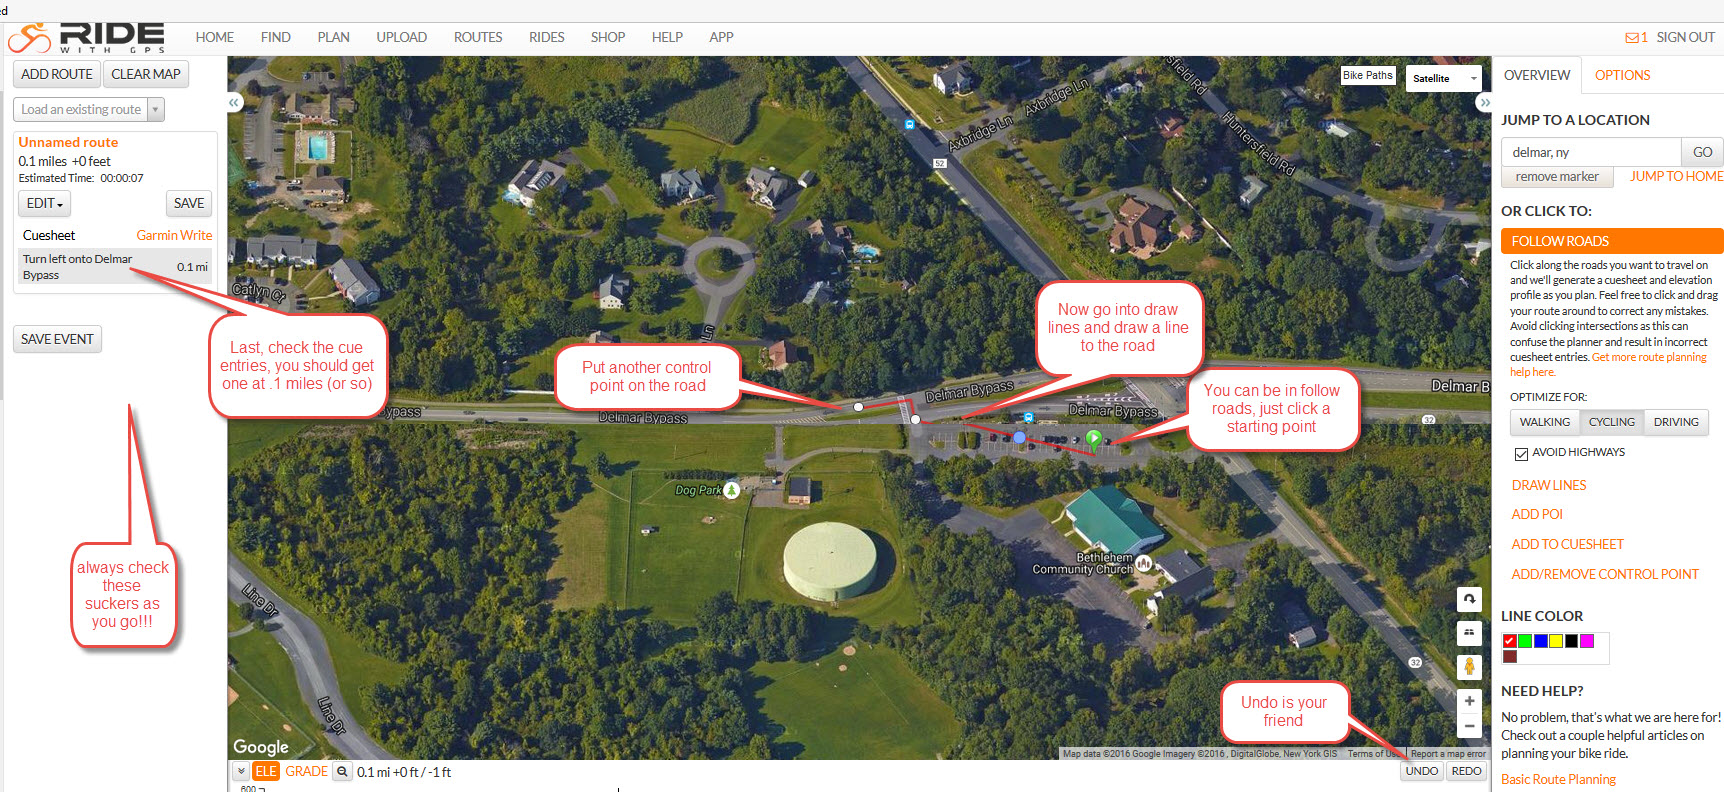
The steps annotated above are: 1. click a starting point in the parking lot. Green arrow will appear. Now, go into draw lines. The mapping software does not know about so-called "routing" inside parking lots so you will have to guide it. Just click on the road outside the parking lot to finish the line, switch to Follow Roads, then maybe another click a short ways down the road in the direction you want to go. A cue entry should appear on the left. As the annotation indicates: check it, check it check it. You need that .1 miles cue before proceeding.
Believe it or not, much of your hard work is done at this point. Routing on the road system is a piece of cake by comparison. Once I have my first cue entry on a road, I will usually switch to the Map style (from satellite ... upper right) and zoom out a couple of levels. Go over to your next turn (in this case Van Dyke Road) and click just past the intersection. Think about it: if you click in the intersection what is a poor routing engine to do? It doesn't know which way you want to go. Here's the resulting screen:
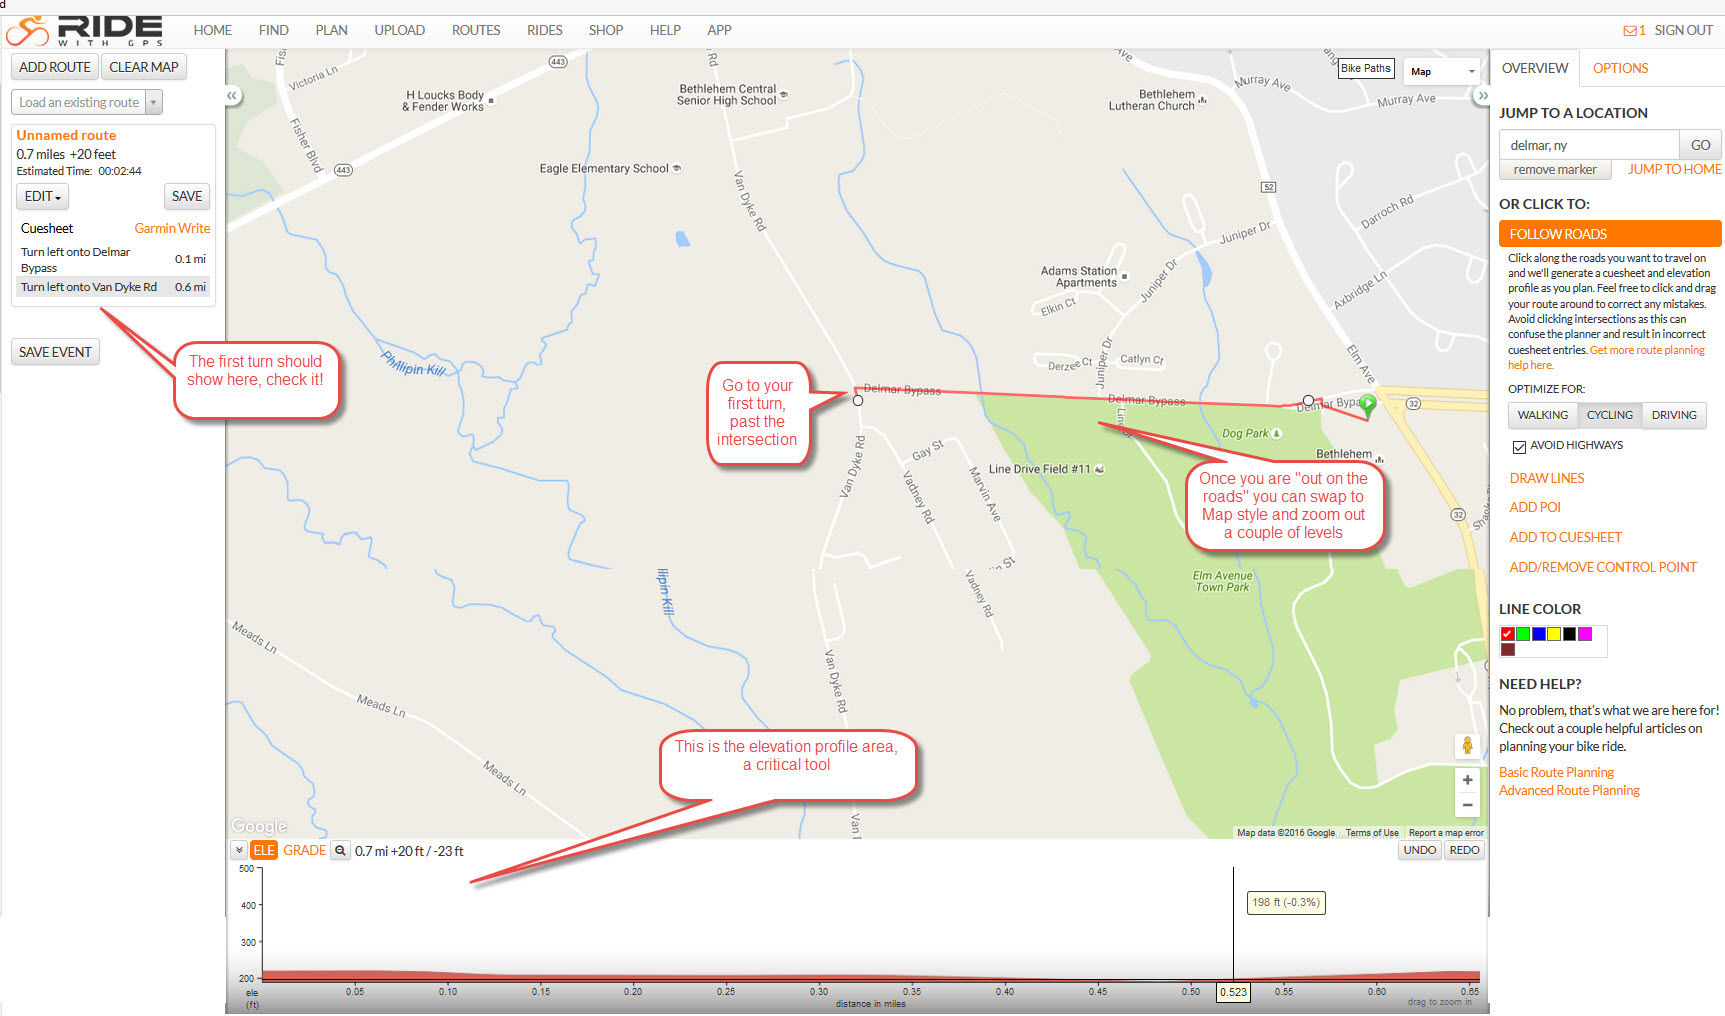
Most of the above is self-explanatory, but this is the first time I've captured the elevation profile. As your routes get longer and more complicated, this becomes a critical tool for managing them. As you move the mouse along the elevation profile, you will see the cursor move along your map. Likewise, as you move along the map you will see the cursor move along the profile. You can use the profile to delete sections of maps or to fine tune a selection. If you get a route where the "going out" and "coming back" route lines overlap, the elevation profile is often the only way you can tell where you are.
To complete this example, we are just going to create a simple route. As opposed to using routing software to tell you how to get to your destination, for most club bike routes we usually KNOW our roads and the route we want to take. In this case we know we want to go down Van Dyke, turn left on Meads, turn left on 32 and come back to the parking lot. Without further ado, here is a route that does this:
To prepare this I had to use zoom out several times, especially when I wanted to get the entire route on one screen. For longer routes which don't involve a lot of turns you'll want to zoom out quite a bit, then zoom in when you get to any "intricate" sections involving lots of turns. In the case of the Van Dyke and Meads turns, there is only one way to get from Van Dyke to 32 so just clicking once past the intersection on 32 gets the two cue entries added. But you want to check this as you go. Next look at the control point on 32 up near the parking lot. I am setting up to put a turn into the parking lot but that will be done in draw lines mode. Following my route line along the elevation profile I can see that this control point is at 3.36 miles into the route.
Next, I zoom in a couple of levels, switch to satellite view and center the map on the parking lot. Since I am going to turn into a non-route-able area, the parking lot, I switch over to draw lines mode. Then I draw (drag the mouse cursor) from the control point at 3.36 miles into the lot where I want to end the ride. I should get another point in the lot and a line connecting it to the 3.36 mile point. Near the 3.36 mile point I click on the add to cue sheet function.
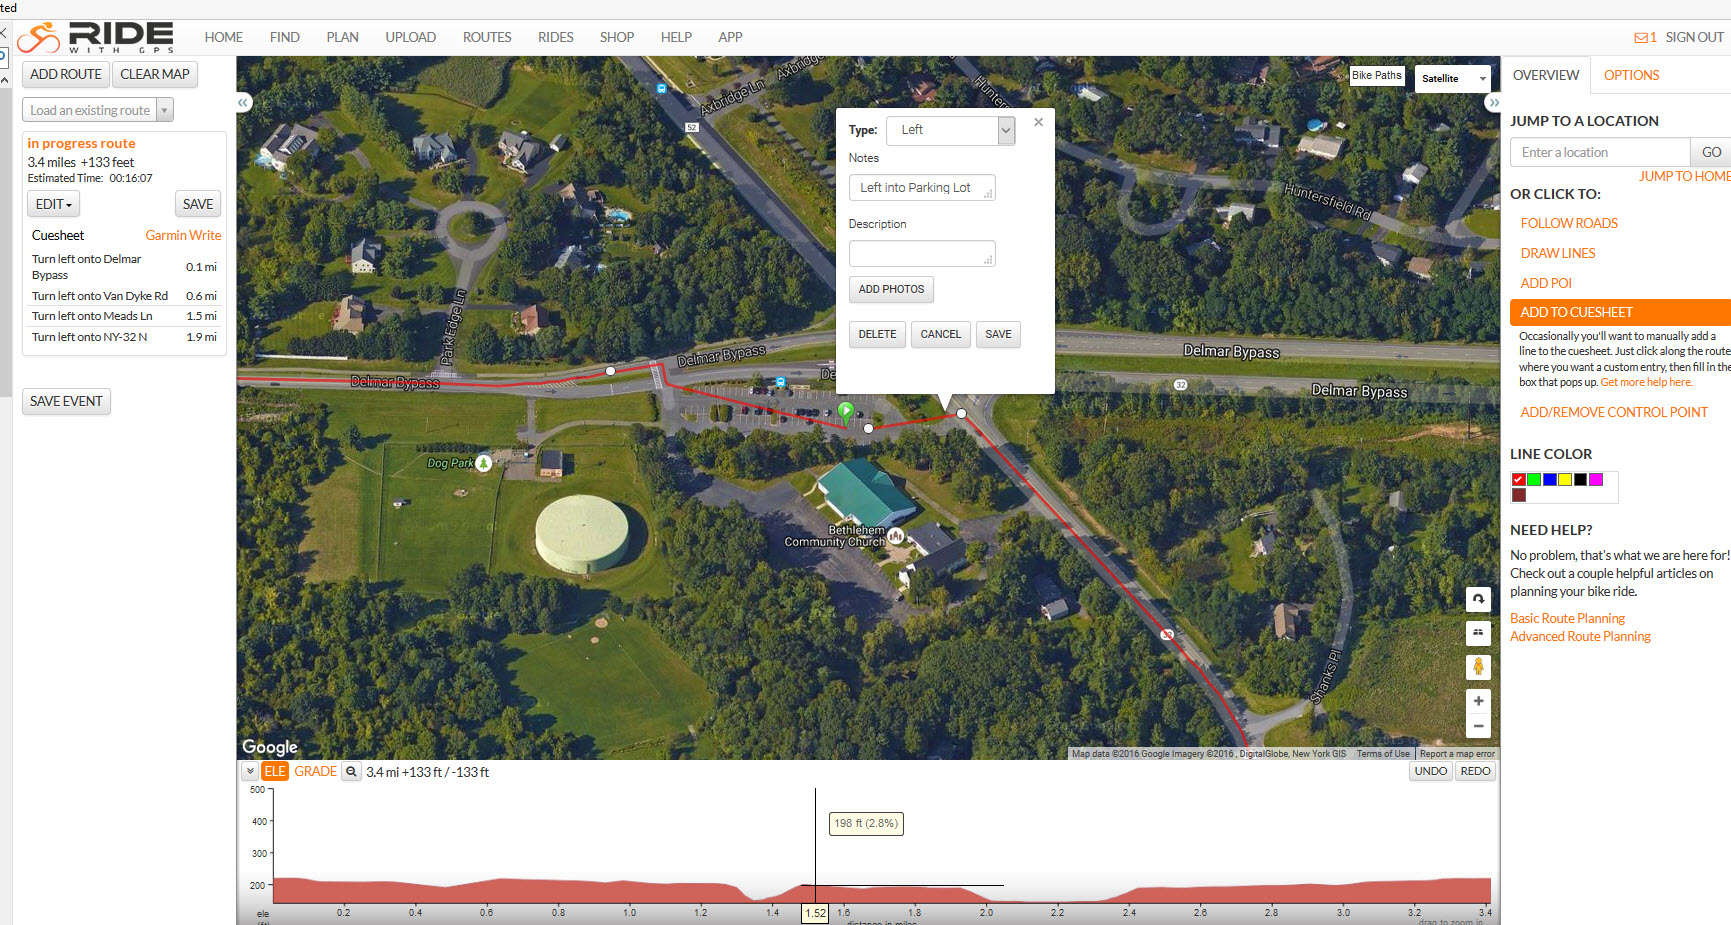
I will get a dialogue box to enter the final cue. Note that type (left, right, straight etc.) is not necessarily correct for these. Check it and adjust as needed. Once you save it, you get the map shown below.
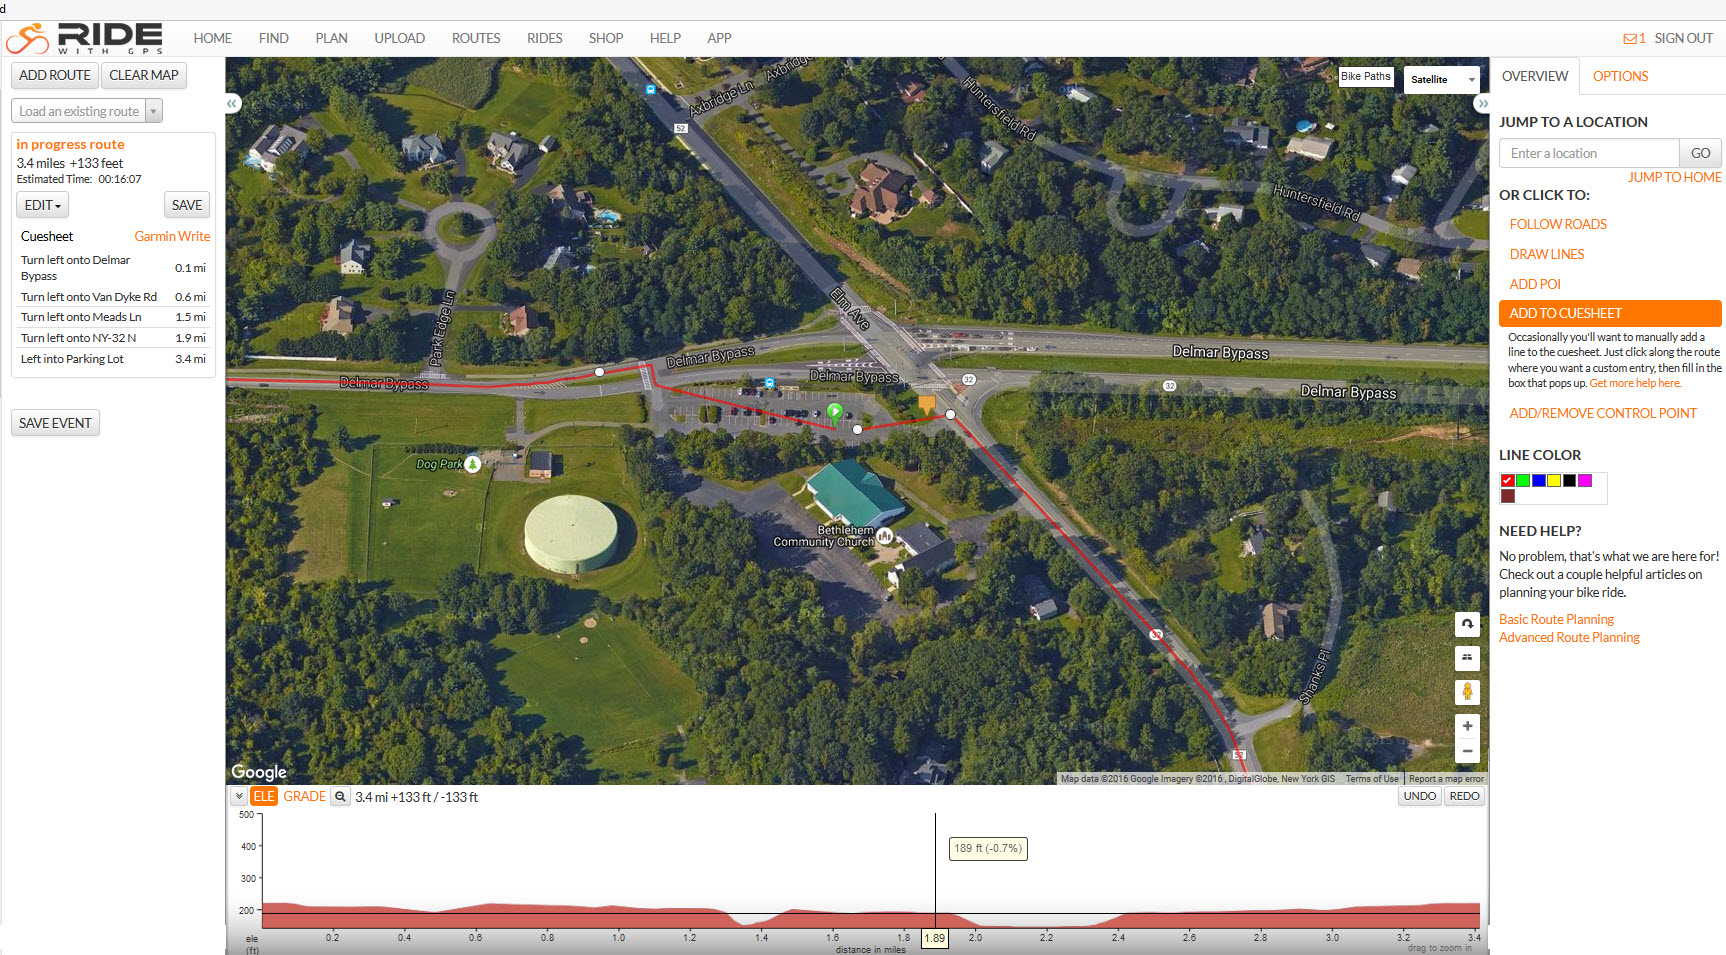
Not much special here ... My simplified route is complete with 5 turns. Ready to save.
Here is the save dialogue.
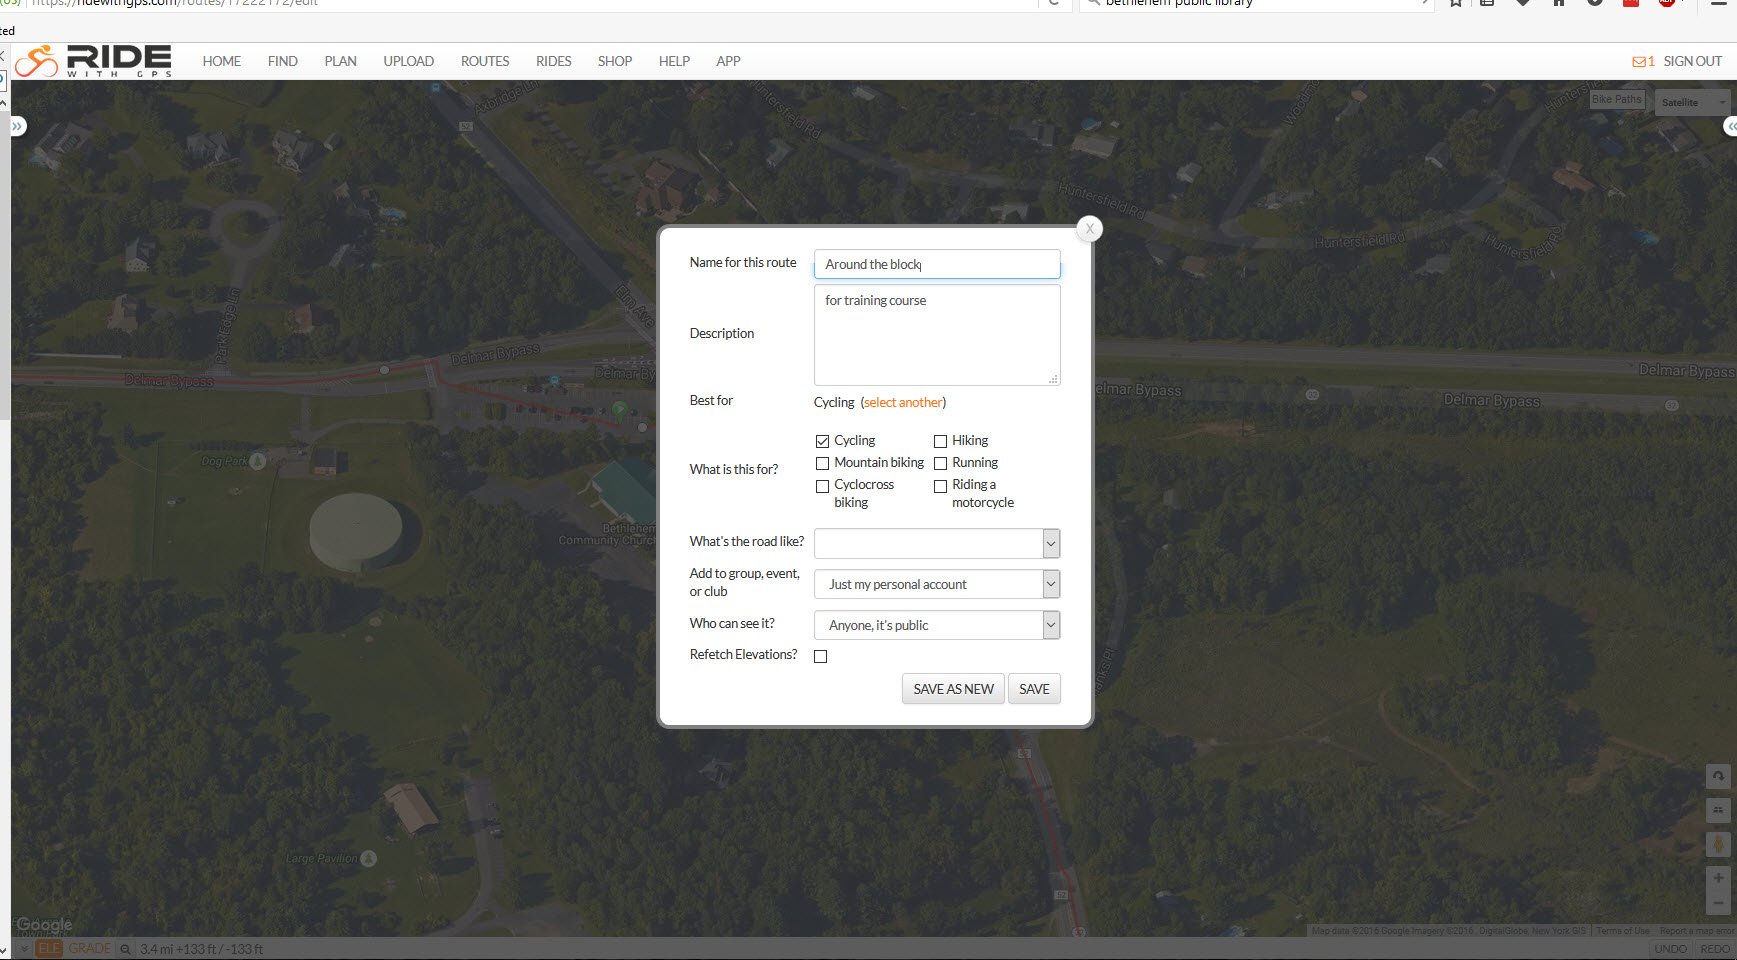
A couple of things need mentioning here. First, you can do "incremental" saves. So, when the dog goes nuts or the kids are screaming and you don't know when you will get back, go ahead and do a temporary save of your file. Likewise, if you are doing a complicated route with lots of turns go ahead and save every 15 minutes or so. On my computer, if I accidentally hit ctrl-w the tab I am working in disappears. Anything I haven't saved is lost. No way to disable this stupid shortcut, so I try to remember to save periodically. For saves you have the option to SAVE which will overwrite any previous version with the same name, or SAVE as NEW, which will create a new file (hopefully you will change the name in the NAME for this Route area first). There is also a description field. Use this to remind yourself (and others) what these changes are about. This becomes even more critical when several of us are working on the same route in the club area.
Once you've saved the route, you'll have the option to view it. Or you can select it from your list of routes, or use various find criteria to find it and view it. And once you've done that you will get the option to PRINT PDF (if you are a premium member or working in the MHCC club area). The print PDF screen is shown below:

Most of the options here are self-explanatory. The PDF files will be sent to your email address where you can review them. One thing to note: the map part of the print (as opposed to the cue sheet entries) will often be "too small" and not show many intersecting roads. I usually find that I can zoom this in one or even two levels and still retain all the map information. This will give you more detail. Try it and discard any results that don't work. Also if your map is more horizontal (east to west) than vertical you may get better results by flipping the map orientation to landscape. PDFs are usually sent almost instantaneously.
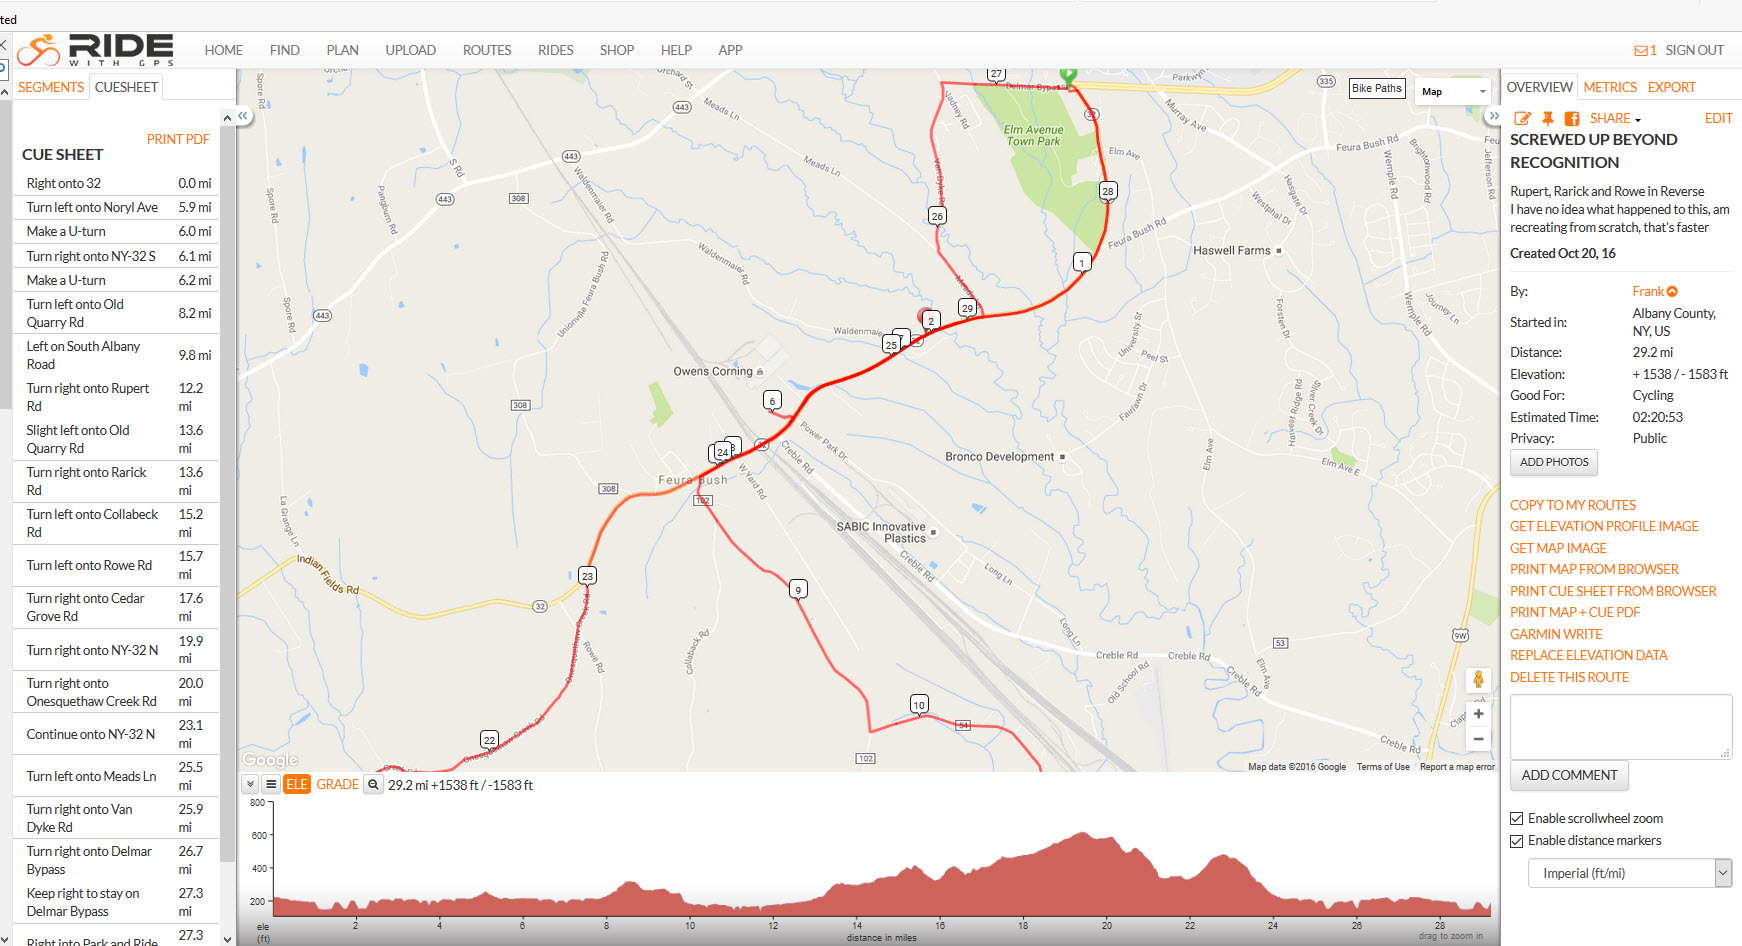
Now we are going to talk about some edge case or problematic situations. If you create more than a few maps and try to customize other users maps, you will eventually run into situations where you could swear the system has gone bonkers. (That's a technical term). I've put a messed up map in my own user area so you can retrieve it, save it to your own user area, experiment a bit and then get rid of it. The url is:
https://ridewithgps.com/routes/17264986
It is shown below. In view mode (as opposed to edit) you'll notice some anomalies. Like distance markers along route 32 that seem to double back on themselves.
But to really see what's going on you'll need to copy it to your routes and then edit it. A zoomed in view of the problematic areas is shown below:

Trying to fix something like this by removing extraneous control points can be well-nigh impossible. It is often MUCH faster to just create the route from scratch, using the original as a guide of sorts. Keep the original open in one browser tab and create the new map in another. Avoiding situations like this is why I have the "check it, check it, check it" emphasized. You don't want to get in a situation where you have to do a dozen levels of undo ... results as IBM used to say can be unpredictable. When you are done, delete any copy of this you've made off your own username.
Here's another problematic situation you will hit at some time. Basically, the mapping software that rwgps uses behind the scenes (Google or OpenstreetMap) sometimes has errors and/or obsolete names in it. The map below shows an example:
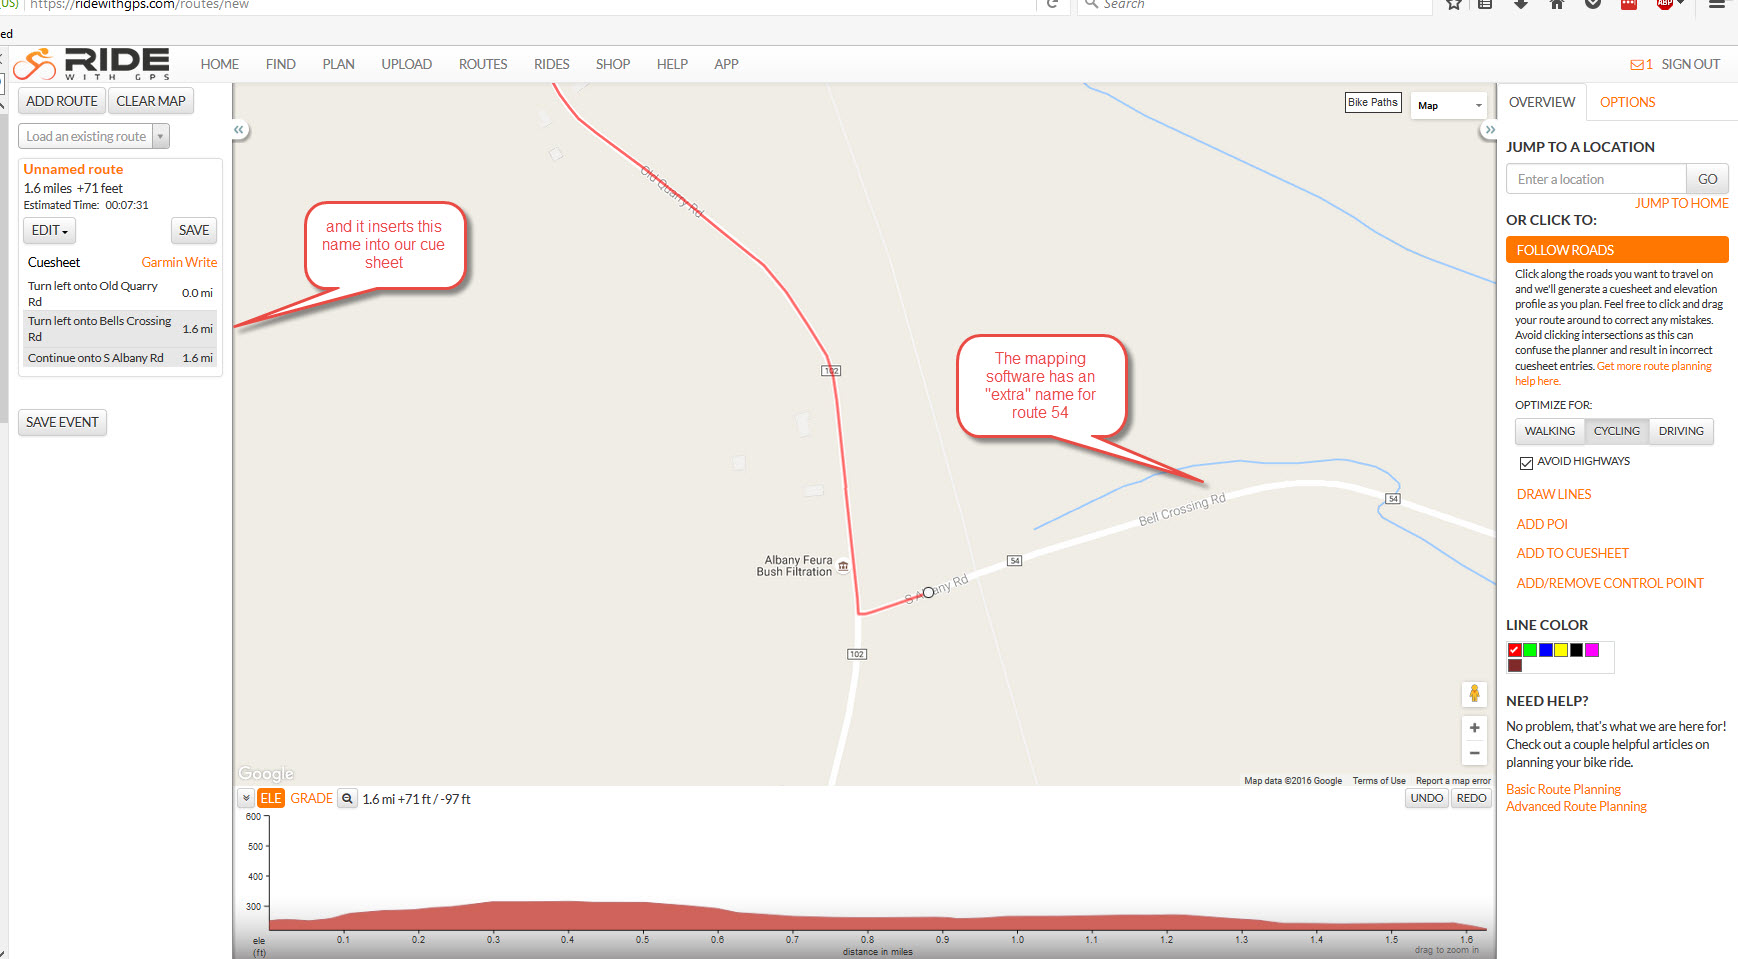
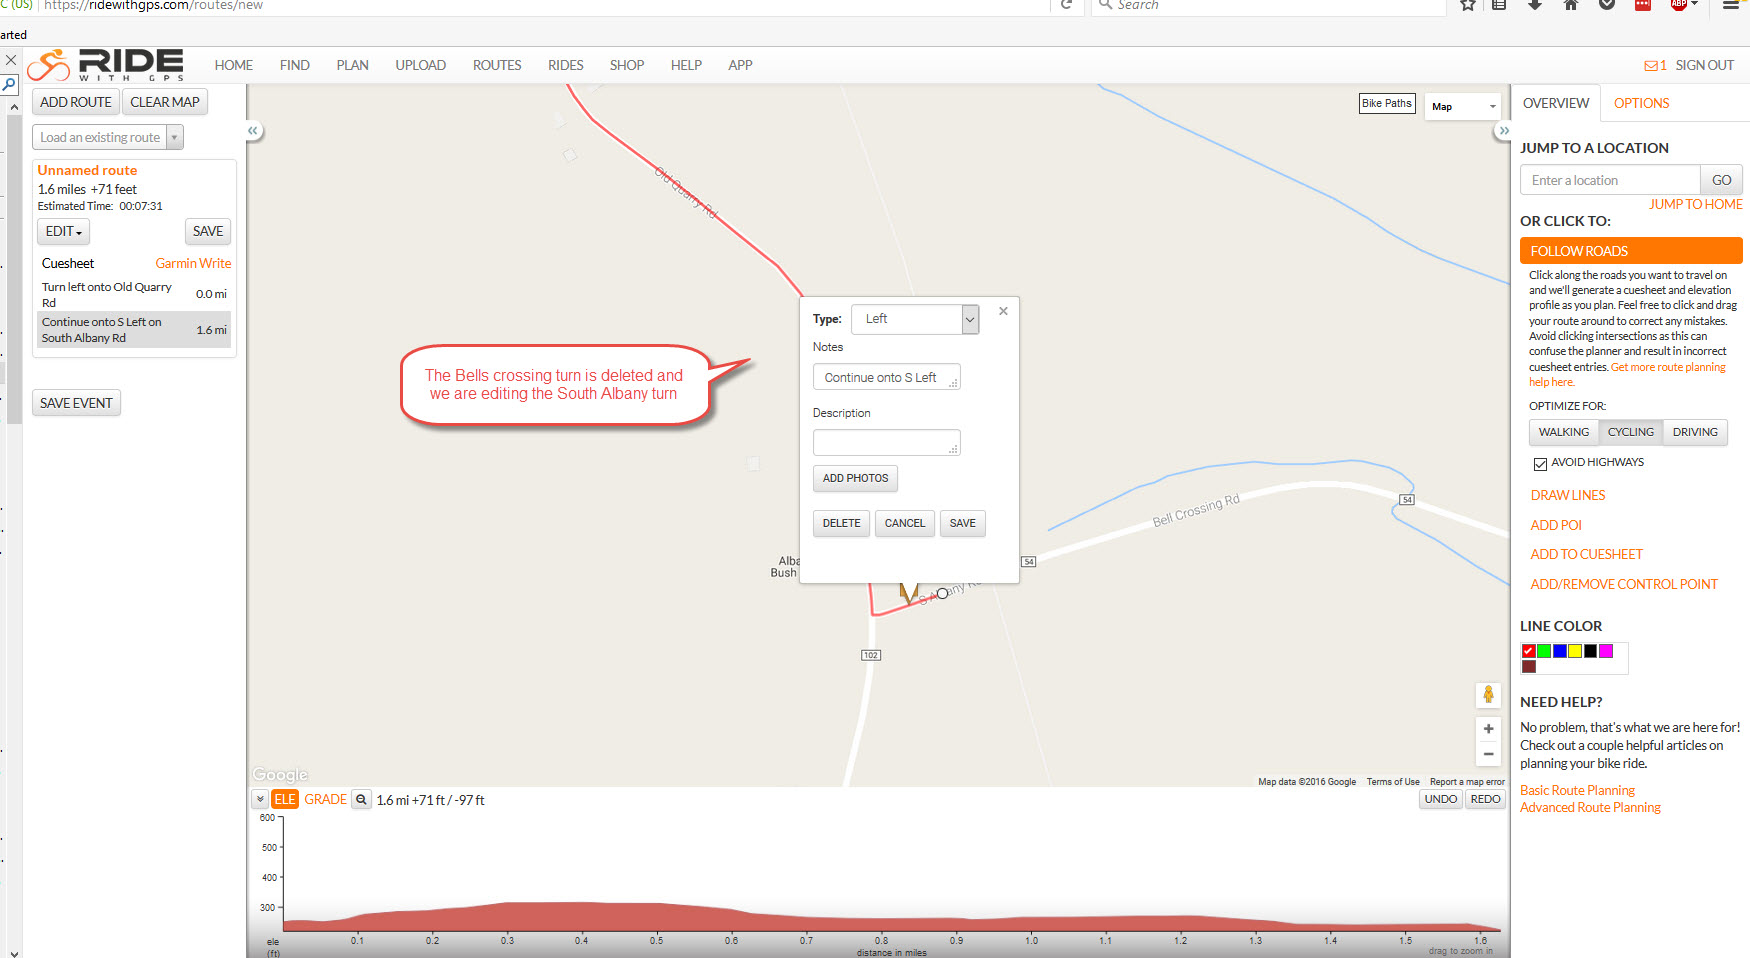
What is this Bells Crossing Road. Actually if you ride out in the area you will see a sign for it somewhere along the road. But we don't want to confuse our riders looking for Bell's crossing. It is South Albany road or route 54 and that's what riders will see as they come along route 102. Since we are checking our cue entries as they are made we see this almost immediately and can deal with it. Just click on the cue for Bell's Crossing and delete it. Then edit the cue that says "continue on S. Albany Road" and change it to say "left" on South Albany Road. The proceed. And yes, you can come back when the map is finished and adjust things like this but it's so much easier to fix it right away. The edit, in progress, is shown below:
Live, local and late breaking ... in 2021 due to participation in Google's mapping ambassador program and after two years of trying (and by sending them pictures of the incorrect spot on their map) I was able to get this fixed. Bell's Crossing should no longer appear in routes created from 2021 on. Not sure if this will "fix" old routes. (frank)